> ## Documentation Index
> Fetch the complete documentation index at: https://docs.shieldlabs.ai/llms.txt
> Use this file to discover all available pages before exploring further.
# Build with AI
> Use AI coding assistants to integrate ShieldLabs faster.
Most of a ShieldLabs integration is glue code: load the snippet, identify your signed-in users, verify a webhook, turn a Risk Score into a decision. The prompts below are written so you can paste one into your AI assistant, fill in the placeholders, and get working code back. Each one already carries the product facts the model needs, so it does not guess.
**Two ways to give your AI tool the full context.**
* Every page in these docs has a menu in the top-right to **Copy page**, **View as Markdown**, or open it directly in **ChatGPT** or **Claude** with the page preloaded, and to connect the docs to **Cursor** or **VS Code**.
* The entire documentation set is published as a single file at [`/llms-full.txt`](https://docs.shieldlabs.ai/llms-full.txt) (with a short index at [`/llms.txt`](https://docs.shieldlabs.ai/llms.txt)). Paste either URL into your assistant to load all of ShieldLabs as background before you ask.
## Install the snippet
Replace the placeholders, then paste into ChatGPT, Claude, or Cursor.
```text theme={null}
You are helping me integrate ShieldLabs fraud detection into my web app.
Stack: .
Public key: .
How ShieldLabs loads:
- It is a browser ES module served from https://cdn.shieldlabs.ai. Load it with the
dynamic import below; that is the whole install:
const mod = await import('https://cdn.shieldlabs.ai/snippet.js?publicKey=YOUR_PUBLIC_KEY');
- On every page where a user is signed in, call
mod.checkAuthenticatedUser('');
passing a hash of my user id, never the raw id or an email. ShieldLabs builds users,
account-level risk and High-Risk Events on this id.
- On pages without a signed-in user, call mod.checkAnonymous().
- Within one visit (while a page of my site stays open, across route changes in a
single-page app and across open tabs), checkAnonymous and checkAuthenticatedUser run
at most one identification every five minutes for the same user. On a multi-page
site, a full page load in the only open tab can start a new visit.
- At a decision point (checkout, payout change) call
mod.forceCheckAuthenticatedUser('') for a fresh identification when
that page opens. On a login form, call mod.forceCheckAnonymous() on the form's first
focus, and pass the hashed account id only after the password check succeeds.
- The snippet runs in the browser, posts signals to ShieldLabs automatically, requests
no permissions, and loads asynchronously so the page keeps rendering.
- The calls return nothing. To get a request ID, pass { onInitialized: (r) => ... } and
read r.requestID when r.status === 'initialized'. onInitialized fires before the
identification is sent: store the request ID (for example in a hidden form field)
and never navigate or submit a form inside it.
Write the integration for my stack and show exactly where the code goes.
```
## Verify a webhook
```text theme={null}
Write a webhook handler for ShieldLabs.
Delivery format: ShieldLabs POSTs snake_case JSON in an envelope shaped like
{
"event_type": "identification.scored",
"schema_version": "2026-06-01",
"created_at": "2026-06-16T10:00:00Z",
"data": {
"request_id": "",
"user_hid": "",
"risk_score": <0-100>,
"signals": [ { "name": "", "weight": } ],
"observed_at": "2026-06-16T10:00:00Z",
...
}
}
Ignore event_type "webhook.ping"; read the result from data.
Verification:
- The signature is in the X-Shield-Signature header: sha256=.
- Compute HMAC-SHA256 over the raw request body bytes, keyed with my endpoint
secret SHIELDLABS_WEBHOOK_SECRET=. Do not re-serialize JSON.
- Constant-time compare. Reject with 401 on mismatch.
Reliability:
- Delivery is at-most-once with no retries and a 1-second timeout.
- Make the handler idempotent on request_id and return 200 quickly.
- Store user_hid and device_id with each result so I can build the account view later.
Give me the full handler with signature verification and an idempotency guard.
```
## Turn the Risk Score into a decision
```text theme={null}
I receive a ShieldLabs Risk Score for each identification and want to turn it into an action.
Facts:
- risk_score is 0-100. The only value above 100 is 999, a rate-limit marker; handle it
as its own case. Bands: Trusted 0-29, Suspicious 30-59, Dangerous 60-100. The API returns
only the number (risk_score in webhooks, score in History), so map it to a band yourself.
- Webhook signals is an array of { name, weight }: every risk signal that built the Risk Score
and the weight it added. The same name can appear twice with a partial weight, so
aggregate by name. History rows carry score_details, a JSON string of { Value, Description }.
- Branch on the band, on signal names and on the detection_flags booleans. Treat the
Description text in History as a display label that can change.
- user_hid is the account. It is "anonymous" for checks without a signed-in user.
- I choose the action for each case: allow, challenge (step-up or 2FA), send to manual
review, or block. A legitimate user can reach the Suspicious band (corporate VPN,
privacy browser), so weigh the Risk Score against how sensitive the action is.
Write a function decide(riskScore, signals, actionSensitivity) that returns one of
allow | challenge | review | block, based on the three bands and the action sensitivity.
```
## Read a user's history
```text theme={null}
Write a function that reads one user's history from the ShieldLabs History API.
Endpoint: GET https://account.shieldlabs.ai/api/v1/history/{search_type}/{value}?limit=N&offset=M
- search_type is one of: user_hid, device_id, visitor_id, ip, request_id, session_id, cookie_id.
Use exactly these values.
- limit is 1-100 (default 20); page with offset. The response is { data: [...], total }.
- Each row in data is snake_case: request_id, user_hid, visitor_id, device_id, ip, country,
score, score_details (a JSON string), created_at, and is_* flags.
- score is 0-100; the only value above 100 is 999, a rate-limit marker: skip those rows.
Bands on score: Trusted 0-29, Suspicious 30-59, Dangerous 60-100. The worst band of
the user's rows is the user's band.
- An all-zero device_id (00000000-0000-0000-0000-000000000000) means no usable device
signals reached ShieldLabs for that identification; do not count it as a device.
- Auth: Authorization: Bearer (sec_..., from Integration > API keys in the
ShieldLabs analytics dashboard). Keep the key server-side only.
- History reads use none of my included identifications. The limit is 15 requests per
second per domain; back off on HTTP 429.
Give me the function plus a short example that pages through every identification of one
user_hid and prints the worst band, the distinct device_id and ip values, and how the
score changed over time.
```
## Install with AI from the analytics dashboard
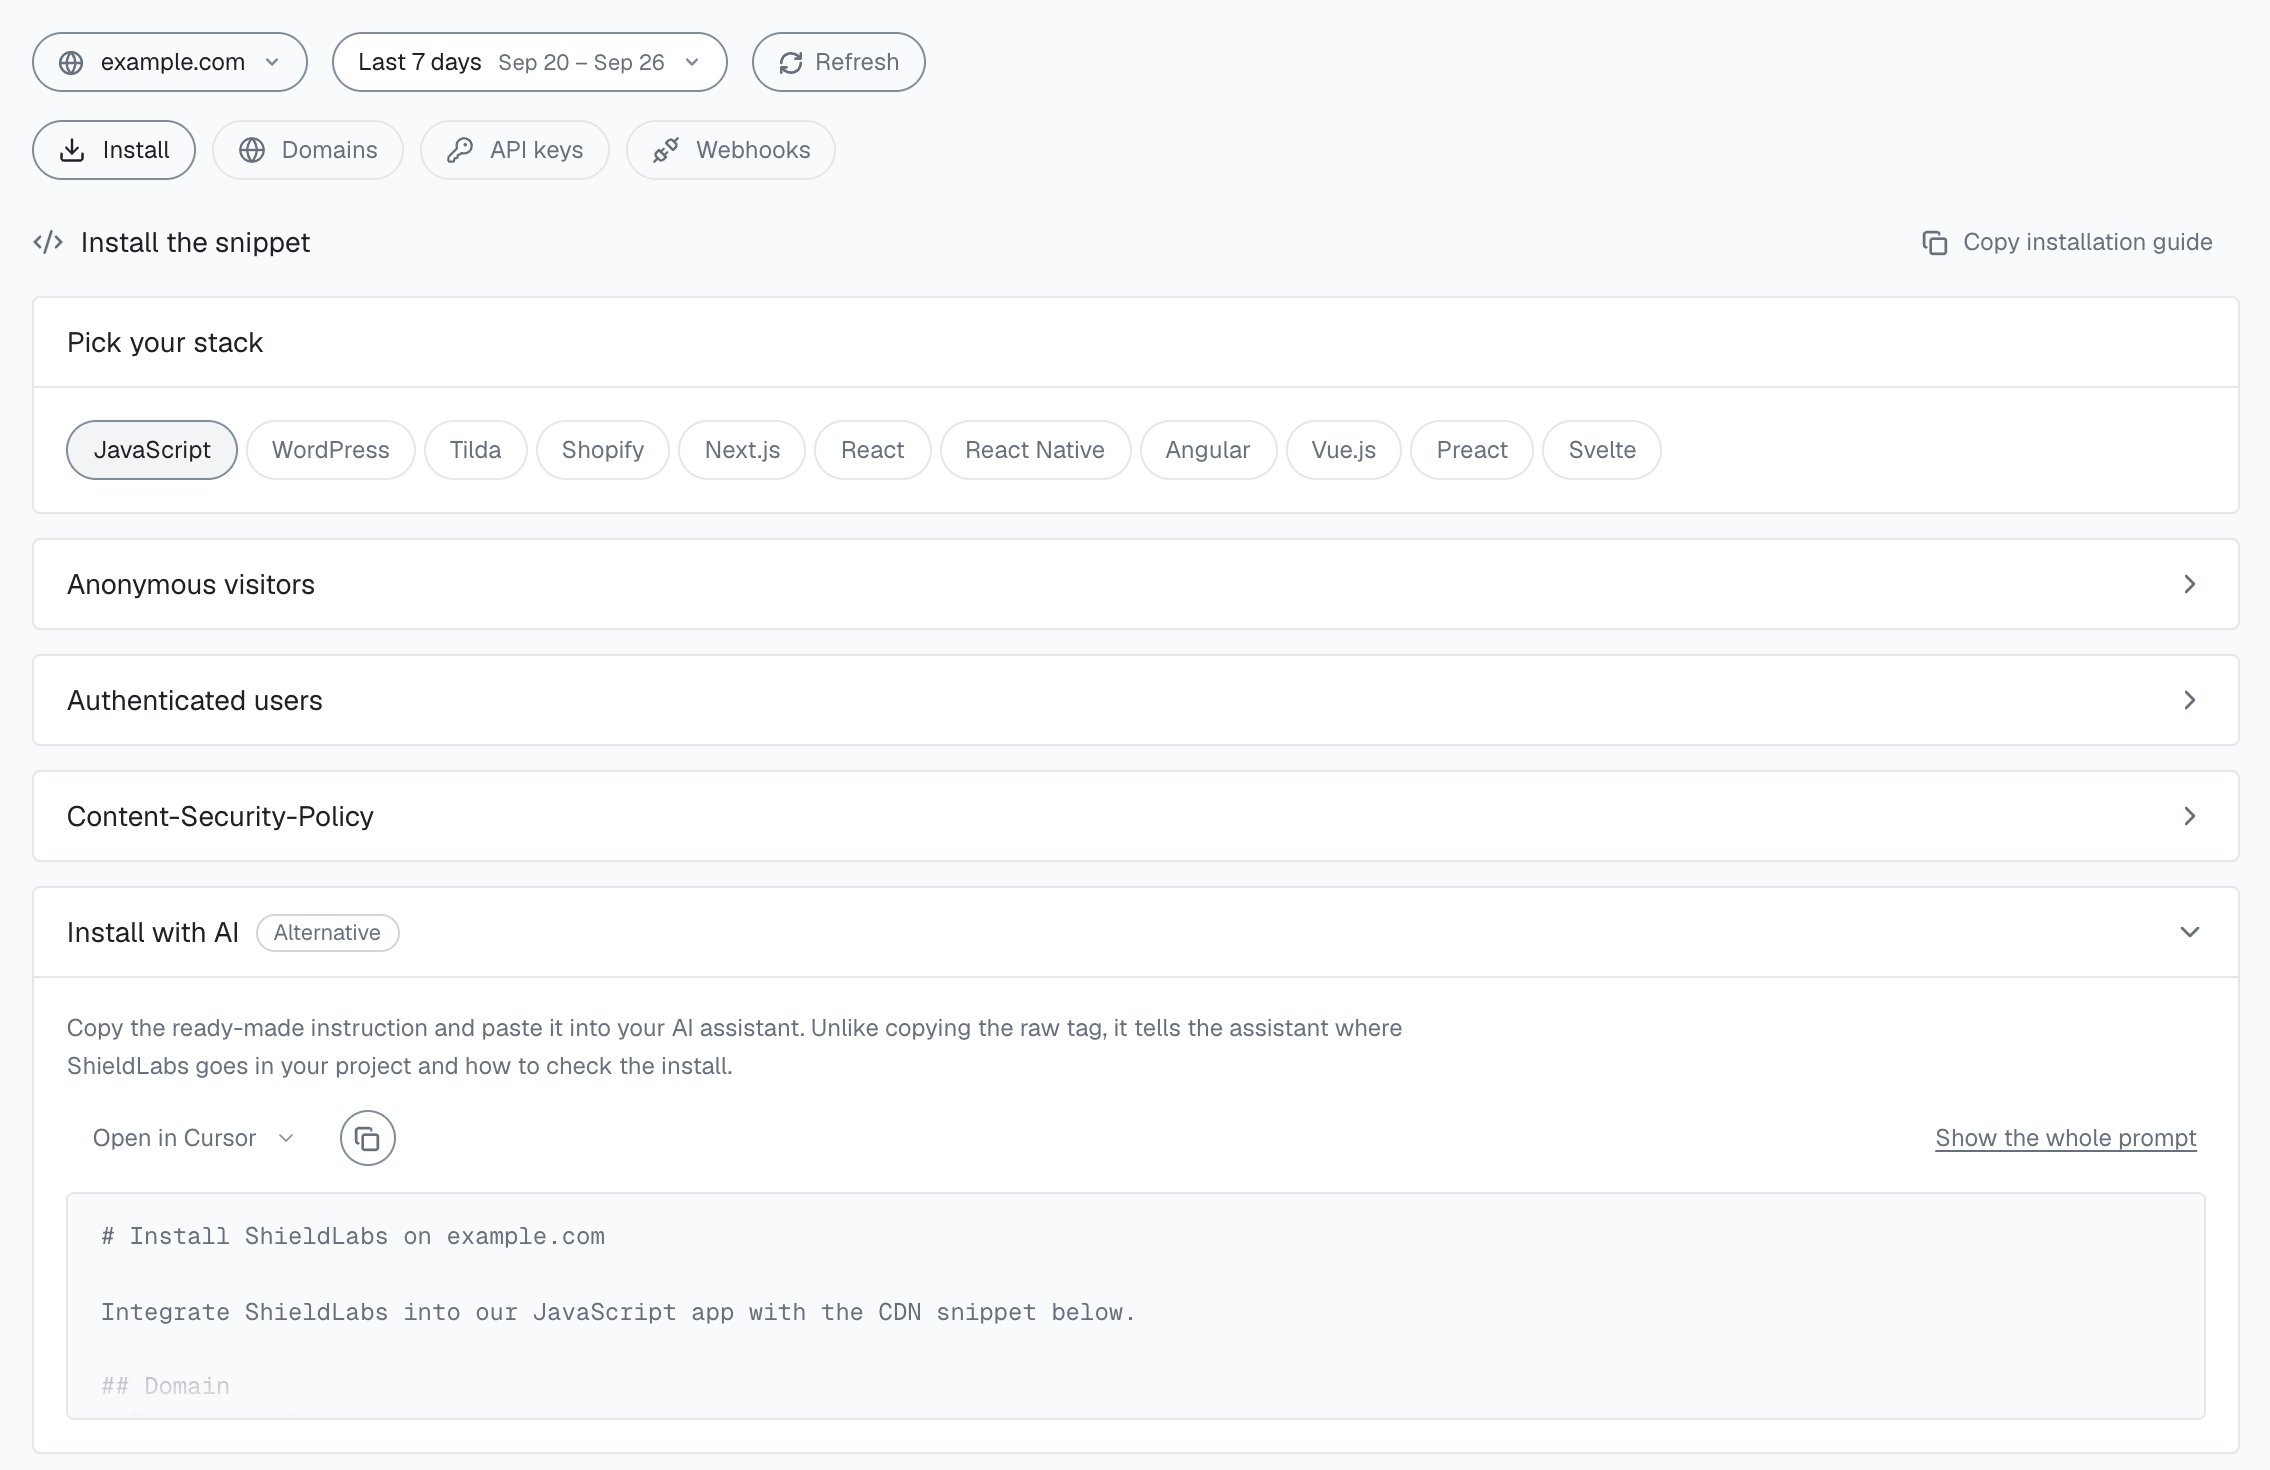
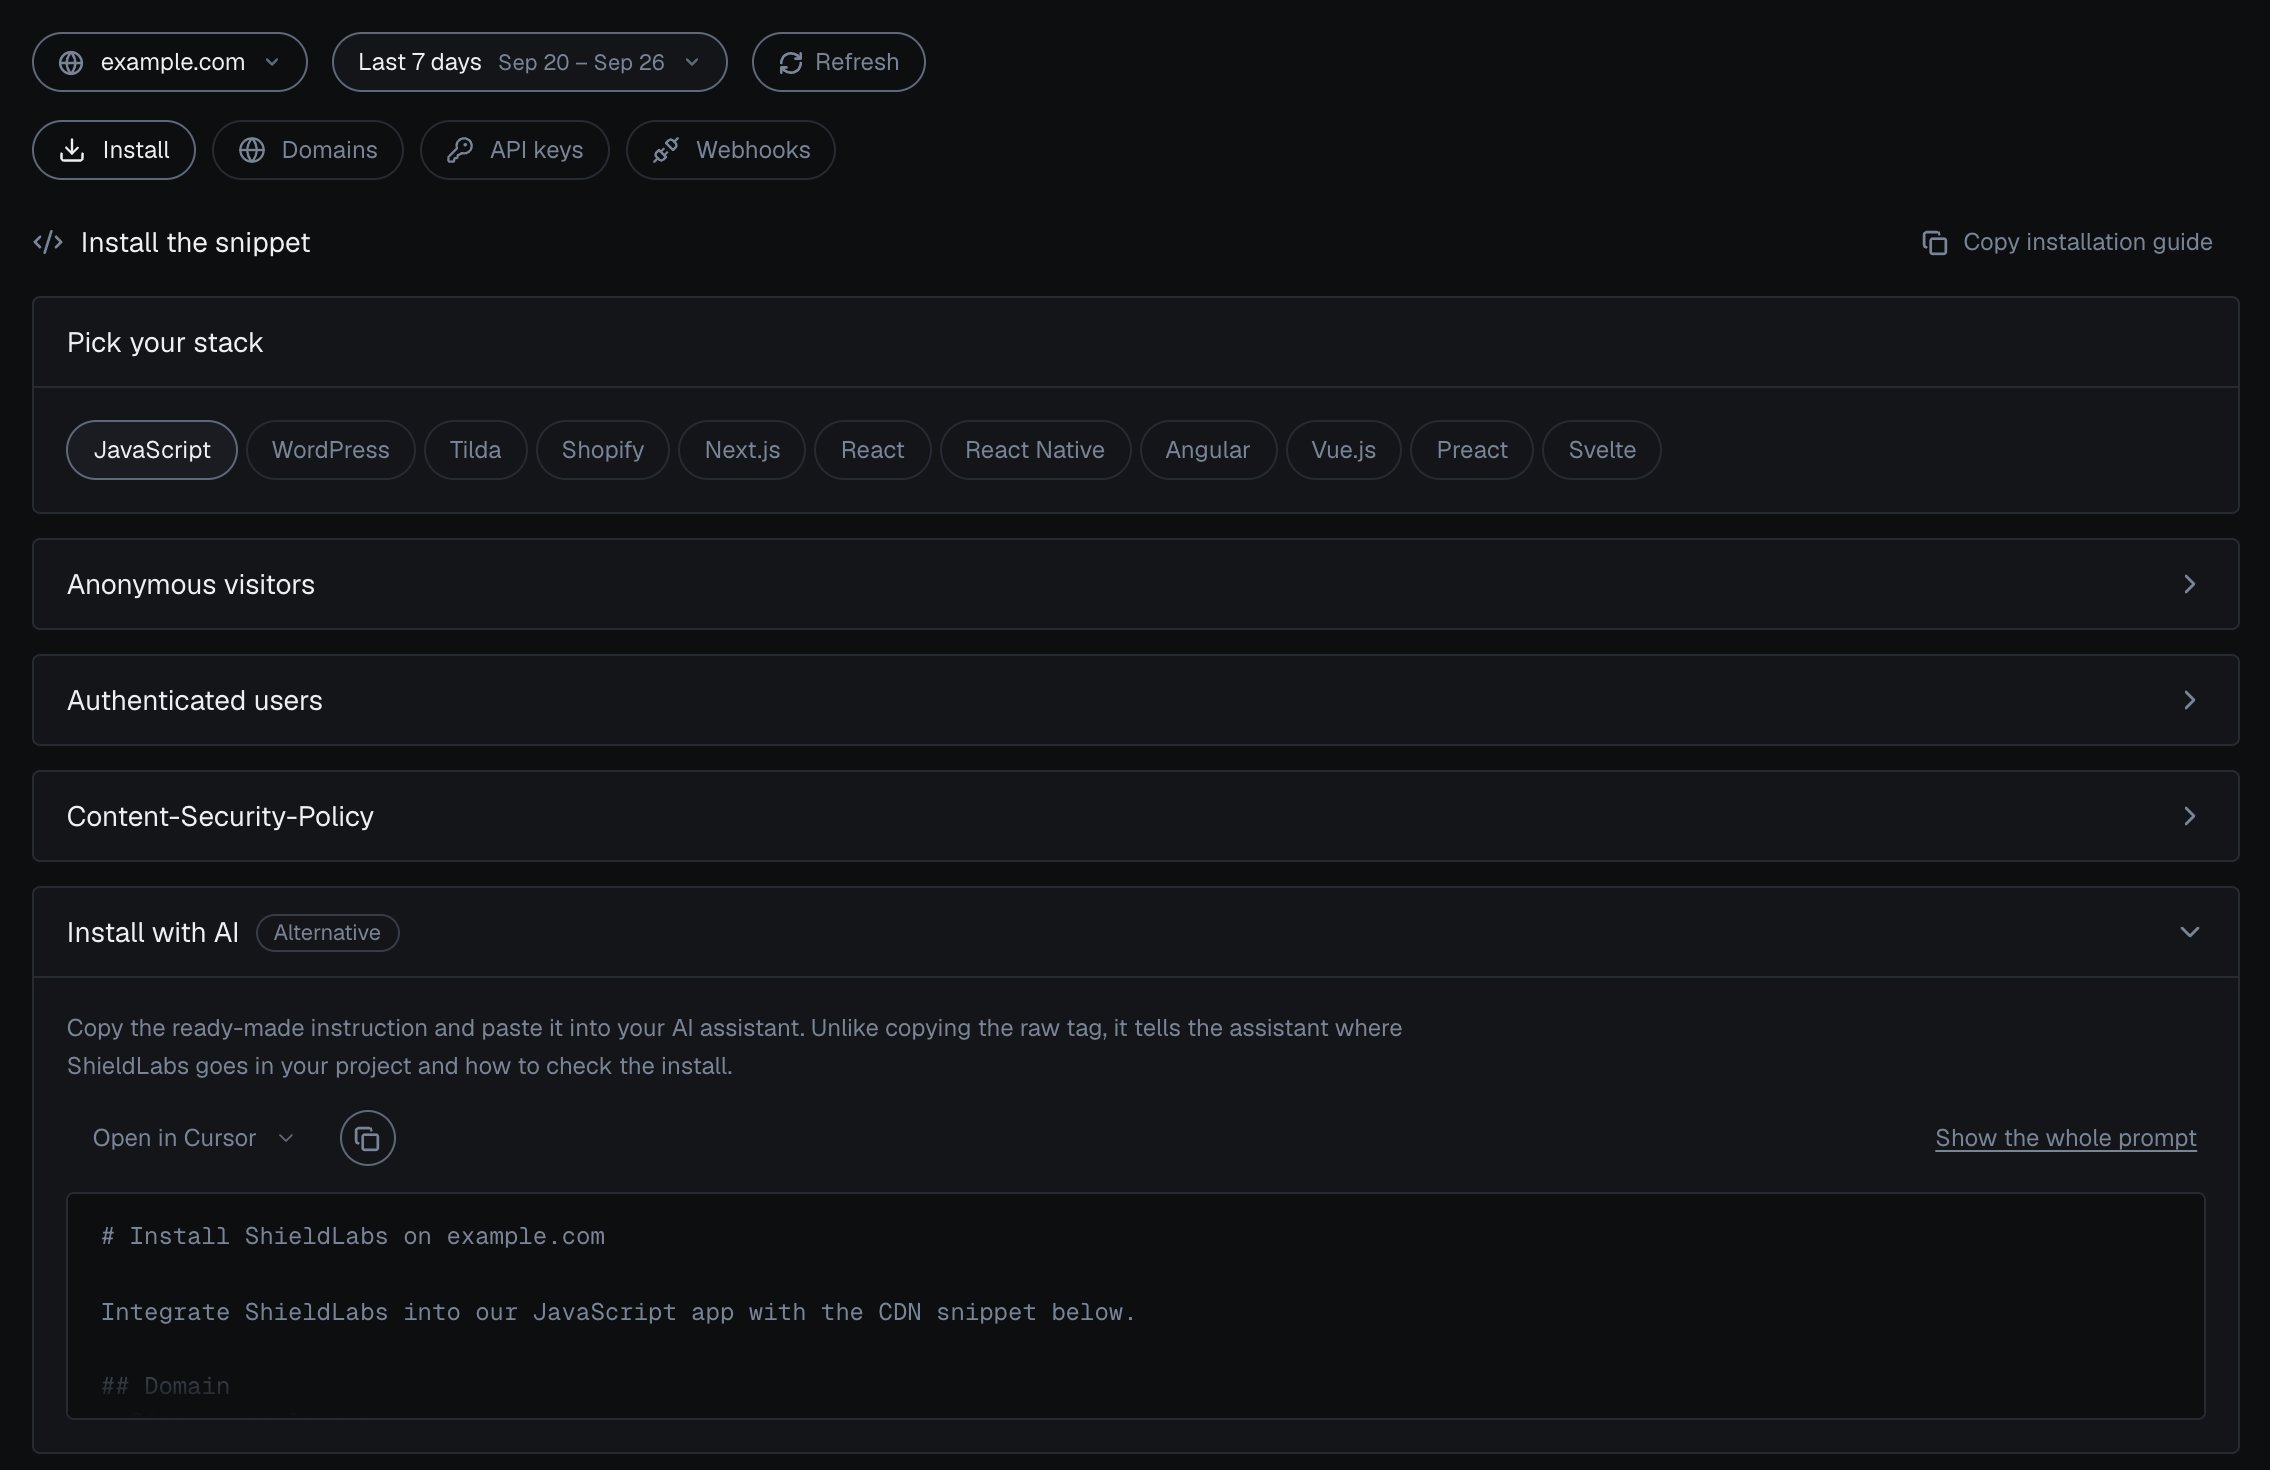
In the analytics dashboard, **Integration > Install** has **Install with AI**: a ready-made instruction to paste into your AI assistant, already filled in for the selected domain and stack. It carries your domain and Public Key, the snippets for anonymous visitors and signed-in users, and the Content-Security-Policy header for a site that sends one. It tells the assistant where the snippet goes, to pass a hashed user ID on signed-in pages, and how to check the install. Copy it with the copy button on the card or with **Copy installation guide** at the top of the tab, and select **Show the whole prompt** to read it first. See [Integration](/dashboard/integration) for the rest of the screen.
 ## Keep the model honest
When you paste generated code back, sanity-check it against the real product:
The real exports, framework examples, and what the browser collects.
The snake\_case event payload, `X-Shield-Signature` verification, and handlers in Node, Go, and Python.
The Risk Score from 0 to 100, its bands, and the `signals` breakdown to branch on.
History and profile endpoints with full request and response shapes.
If a model invents an endpoint or a field that the [webhook reference](/api/webhooks) and the [Server API](/api/server-api) do not list, such as a `Description` value, it is guessing. The webhook and the History API carry identifications, and High-Risk Events are available in the analytics dashboard, the API and webhooks. Re-prompt the model with the page above (Copy page, then paste) and it will correct.
This documentation is built and hosted on [Mintlify](https://mintlify.com), a developer documentation platform.
## Keep the model honest
When you paste generated code back, sanity-check it against the real product:
The real exports, framework examples, and what the browser collects.
The snake\_case event payload, `X-Shield-Signature` verification, and handlers in Node, Go, and Python.
The Risk Score from 0 to 100, its bands, and the `signals` breakdown to branch on.
History and profile endpoints with full request and response shapes.
If a model invents an endpoint or a field that the [webhook reference](/api/webhooks) and the [Server API](/api/server-api) do not list, such as a `Description` value, it is guessing. The webhook and the History API carry identifications, and High-Risk Events are available in the analytics dashboard, the API and webhooks. Re-prompt the model with the page above (Copy page, then paste) and it will correct.
This documentation is built and hosted on [Mintlify](https://mintlify.com), a developer documentation platform.