

import() from cdn.shieldlabs.ai, on any site or web app that runs in a browser.
The module collects 300+ device and network signals and posts them to ShieldLabs automatically. ShieldLabs derives the Visitor ID, Device ID and Risk Score on the server and delivers them by webhook and the Server API. Call checkAuthenticatedUser with a hashed User HID for signed-in users and checkAnonymous for everyone else. You correlate the browser call with the server result by the requestID from the optional onInitialized handler.
The snippet stores a long-lived first-party id under the key
cookieID in both localStorage and a first-party cookie. That value is sent to ShieldLabs as cookieID and stored server-side as the Cookie ID. The Visitor ID (one device plus one cookie) is computed on the server from the Device ID and the Cookie ID and reaches your backend with each result.cookieID, the device and network signals the SDK collects, your anti-fraud purpose, and, where applicable, the legal basis you rely on. Never pass directly identifying information (such as names, email addresses, or phone numbers) as the User HID.
Install (HTML)
Add this near the top of<body>. Use type="module" (the snippet relies on import.meta.url and top-level dynamic import, so it cannot run as a classic script).
publicKey is your site’s Public Key, one per registered domain. It is safe to expose in page source. In the analytics dashboard, open Integration > Install and select the domain: its snippets already carry the Public Key (see API keys and the Integration screen).
The <noscript><img> beacon is a crawlable GET /noscript so visits still appear when JavaScript does not run (search crawlers, JS-off browsers). Allow https://rest.shieldlabs.ai in img-src if you set a CSP.
The call is fully async and non-blocking. Several checks run in parallel while the page renders. Each export returns nothing (
void) and never throws. Pass { onInitialized } if you need the requestID as soon as the check starts; omit it to fire-and-forget.Identify signed-in users
On every page a signed-in user loads, callcheckAuthenticatedUser with a hashed User HID instead of checkAnonymous. Users, account-level risk and all four High-Risk Events are built on it. Keep checkAnonymous for visitors who are not signed in.
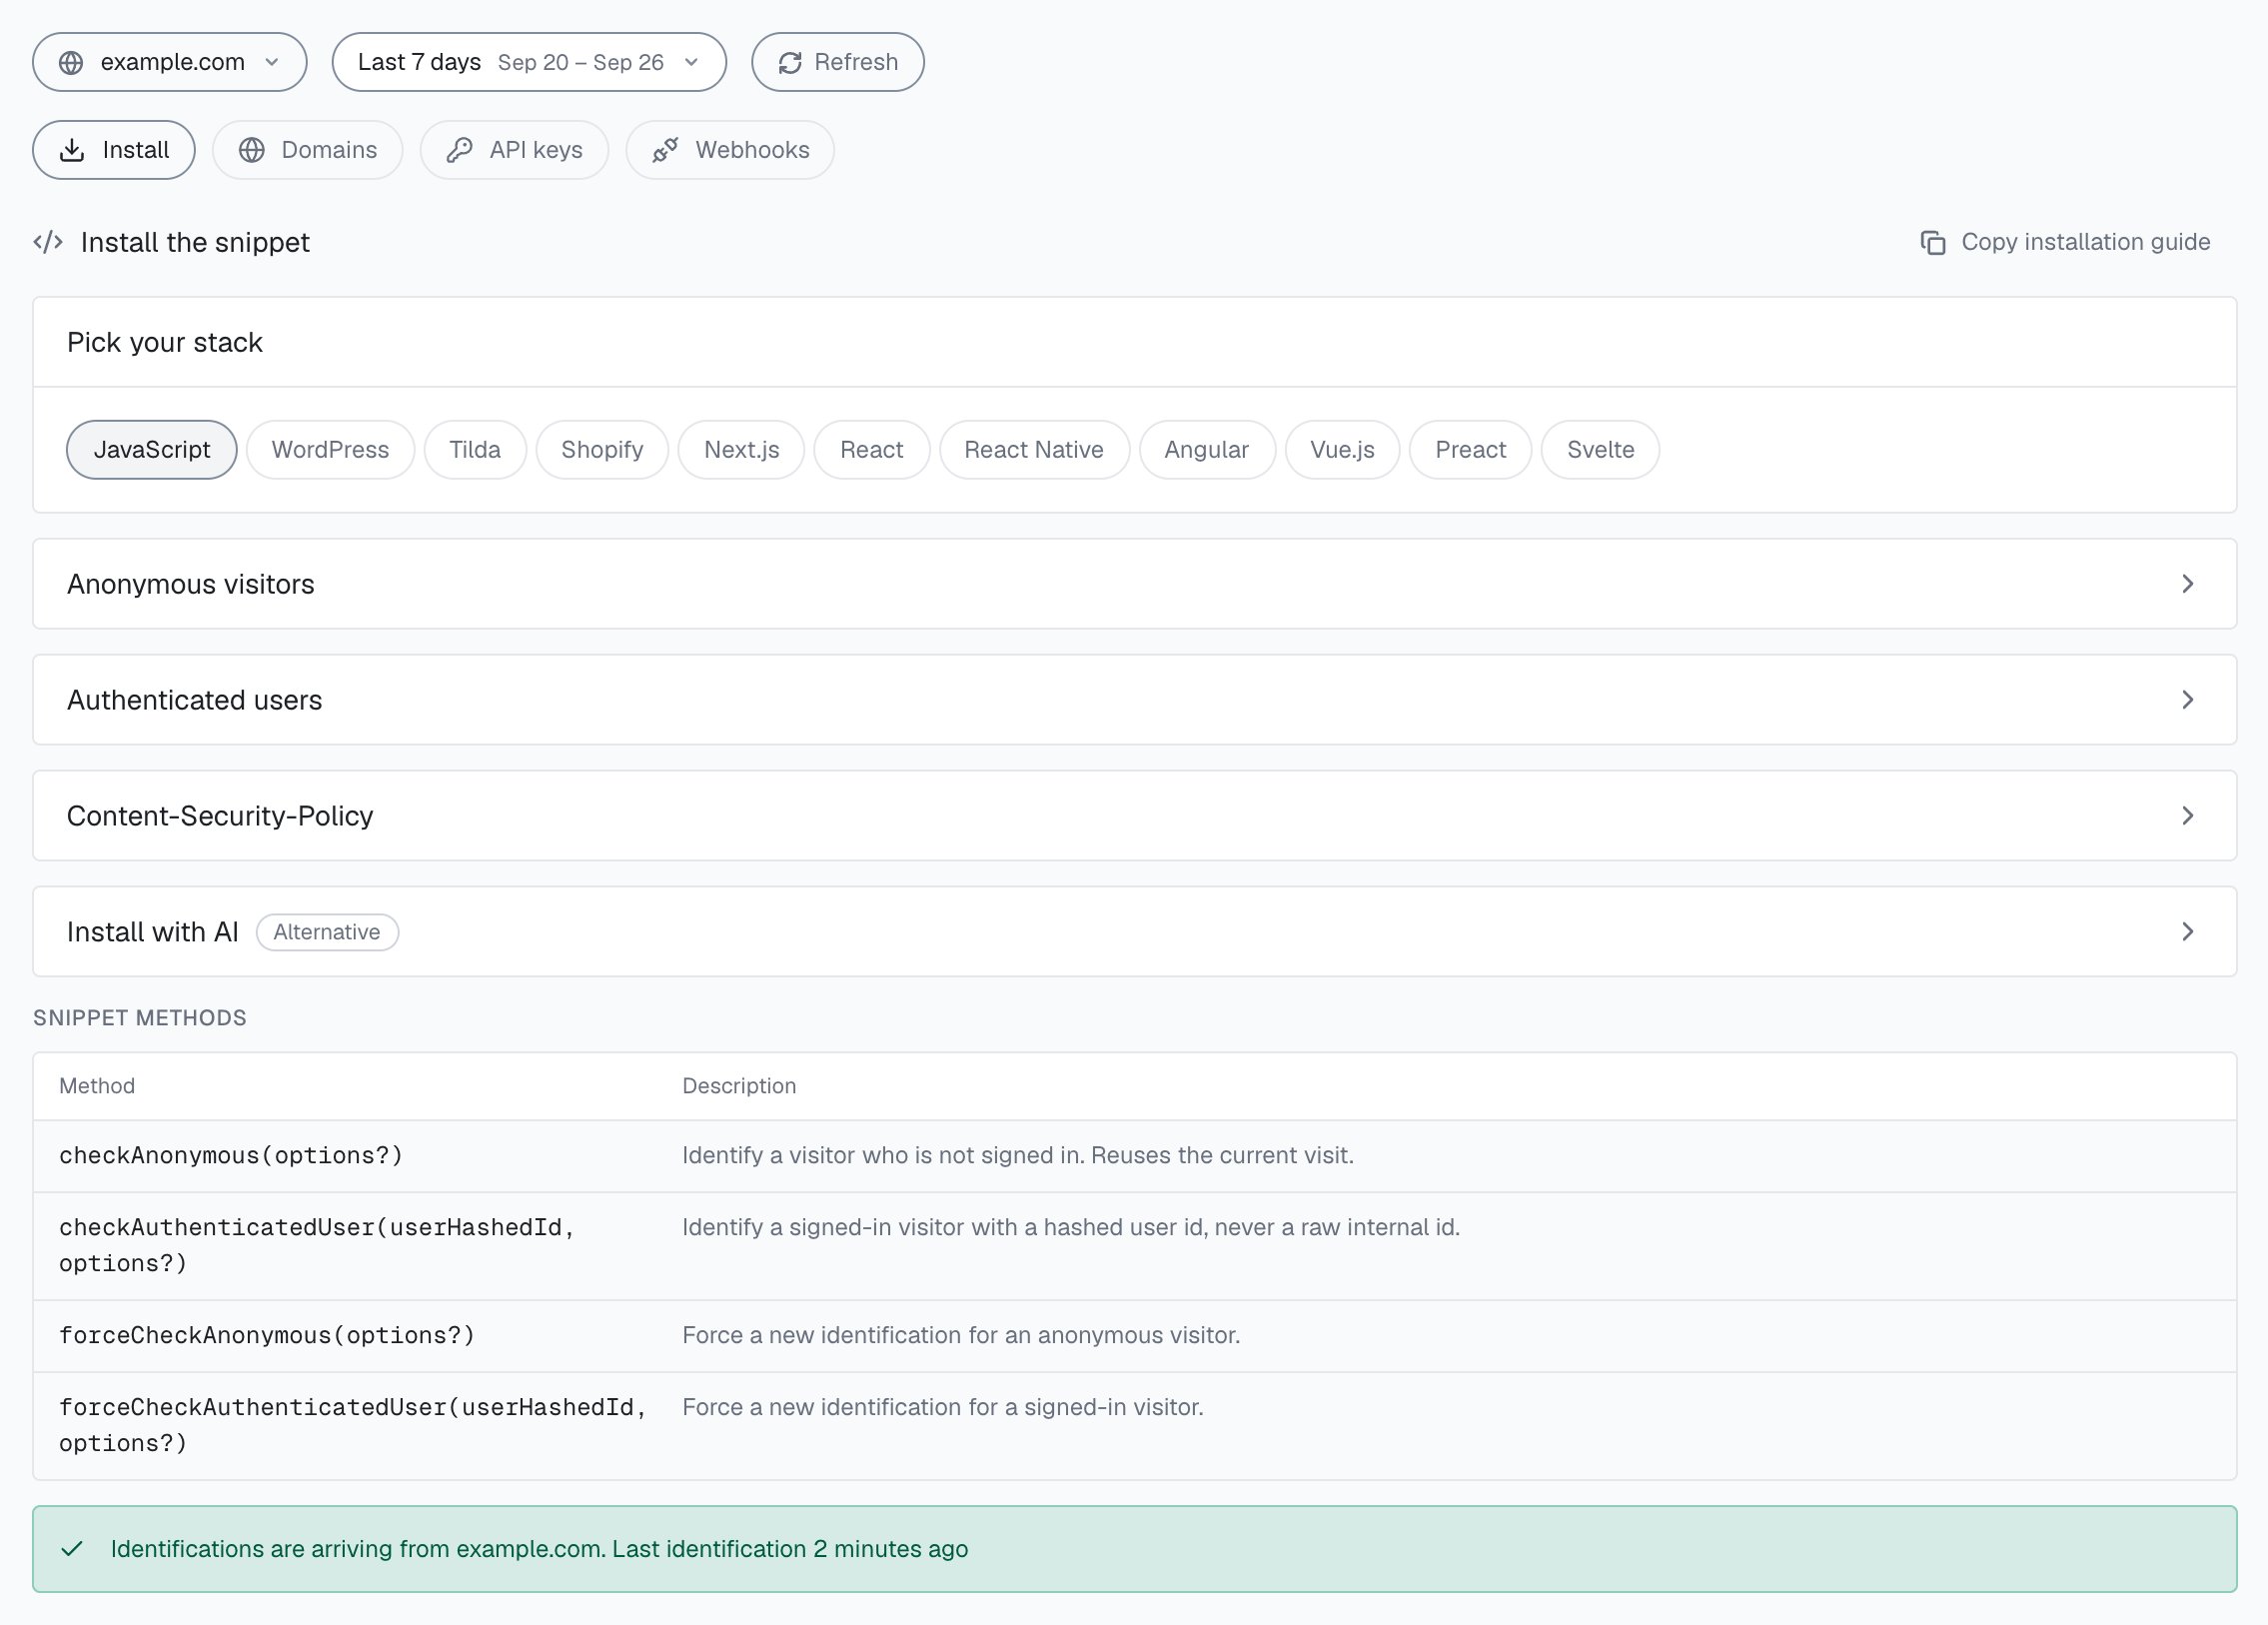
Integration > Install in the analytics dashboard: pick your stack, open the snippet for anonymous visitors or authenticated users, and check that identifications are arriving.
The four exports
The module exports four functions. Each call that runs an identification counts as one identification against your plan. They differ in two ways: whether they tie the identification to your user (User HID), and whether they wait for the five-minute window. Within one visit (while a page of your site stays open in the browser, across route changes in a single-page app and across open tabs),checkAnonymous and checkAuthenticatedUser run at most one identification every five minutes for the same user. A call inside that window posts nothing, counts nothing, and its onInitialized handler receives { status: "not_initialized" }. On a multi-page site, a full page load in the only open tab can start a new visit with its own identification. The forceCheck* exports run an identification every time.
forceCheck*: run now
checkAnonymous and checkAuthenticatedUser share one session per user in the browser, across the open tabs of your site. Calls in the same session share one Session ID. A new session, with a new Session ID, starts on the next page load after the last open page of your site is closed or navigated away from; in a single tab on a multi-page site, that can be every full page load.
forceCheckAnonymous and forceCheckAuthenticatedUser run an identification every time, even inside the five-minute window. They keep the current Session ID, issue a new requestID and restart the five-minute window. Reach for them when the moment matters:
- Right after login. Run the check now that you know who the user is, so ShieldLabs ties this identification to the account.
- Before a sensitive action (checkout, withdrawal, password change, a new device approval). Get a fresh Risk Score keyed to a
requestIDyou can act on.
The optional onInitialized handler
Each export accepts an optional options object. onInitialized is called once, asynchronously, when the check starts (or when no check runs). The methods return void and never throw:
{ status: "initialized", requestID }: the join key to the webhook and the History API{ status: "not_initialized" }: no identification ran and nothing is counted. The five-minute window for this user is still open, another tab is already running the check, the User HID or Public Key is invalid, or the check could not start.
undefined first.
The server computes the Visitor ID, Device ID and Risk Score. Send the
requestID to your backend, then read the result from the webhook payload or the History API (query by request_id).onInitializedreceives{ status: "initialized", requestID }as soon as the check starts, or{ status: "not_initialized" }when no check runs.- The snippet collects signals and posts them to
rest.shieldlabs.ai. - ShieldLabs scores the identification in about 300 ms and delivers one webhook with the final Risk Score. When follow-up network checks run, it waits for them, at most about 10 seconds.
- Your backend matches the webhook (or History API row) to the browser call by
requestID, and to the account byuser_hid.
Framework integrations
The HTML method above works anywhere. In a framework, put the same dynamicimport() inside a lifecycle hook so it runs once on mount. Pass your Public Key in from config or props, and the hashed User HID once the user is signed in.
- Native JS
- React
- Next.js
- Angular
- Vue
- Preact
- Svelte
- WordPress
- Tilda
- Shopify
Capturing the requestID with onInitialized
Pass { onInitialized } in any framework to grab the requestID and hand it to your backend:
onInitialized receives { status: "not_initialized" } and there is no requestID to forward. Where a server-side decision needs a fresh result (login, checkout, a password change), call forceCheckAuthenticatedUser or forceCheckAnonymous at that moment instead.
ShieldLabs returns a Risk Score and every named risk signal on each identification, and detects High-Risk Events on your users. You choose the action for each case (allow, step up, review or block) and act on the result in your backend; acting on results walks each path.
Next steps
Content Security Policy
Allowlist the ShieldLabs snippet hosts if your site sends a strict CSP header.
API keys
Find your domain’s Public Key for the snippet, and the Private API Key and Secret Key for the server.
Webhooks
Receive the scored result keyed by
requestID, one webhook per identification.How ShieldLabs works
Users, devices, visitors and IPs, and the identification behind each Risk Score.